
ONLINE HELP
These help pages apply to version 0.1 release of WifiTrax Workshop. Please upgrade as new versions become available.
Getting Started
This online help is intended as a WifiTrax Workshop reference.
Installing WifiTrax Workshop on your Windows Machine
To install WifiTrax Workshop click on the button "DOWNLOAD AND INSTALL FROM WIFITRAX WEBSITE" on the product description page for the WifiTrax Workshop Application found at: http://www.wifitrax.com/products/product-wifitrax-workshop-app-detail.html. This will activate "Click Once" install so that the necessary code files will be downloaded and installed on your machine. The code is signed using a code signing certificate purchased from a certificate authority. This proves that the application really did come from WifiTrax. Nevertheless later versions of Windows will warn you that this is an unrecognised application and you have to click on the right places to see that it is indeed from Steve Shrimpton Sciences Pty. Ltd. which is the company that owns WifiTrax, and install the application. So carefully follow the instructions below.
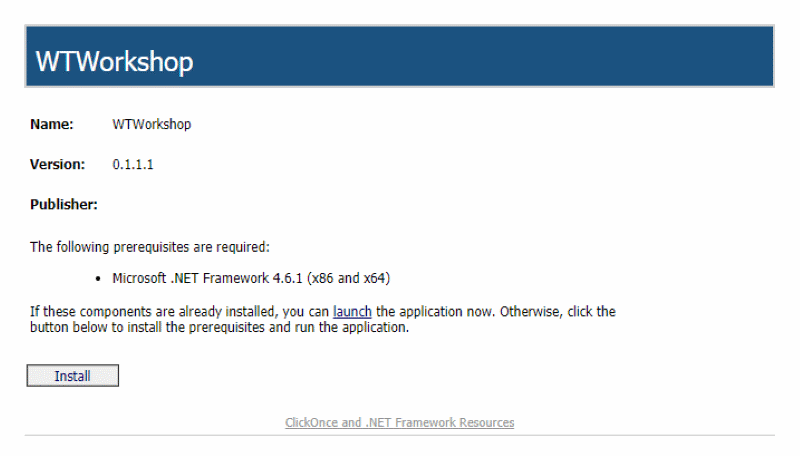
Figure 1.1 Click-once Install Page
When you see the install page, click the Install button which will install the application.

Figure 1.2 Browser Download
The view above depends on your browser, but you should choose the option to Open the downloaded file, which means run the install process.
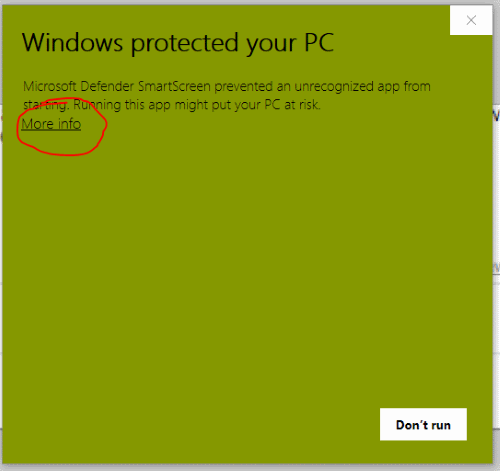
Figure 1.3 Unrecognized App Warning
Windows puts up a warning saying that the app is unrecognized. You must click on "More Info" to see that the app is from Steve Shrimpton Sciences Pty. Ltd., the company that owns WifiTrax.
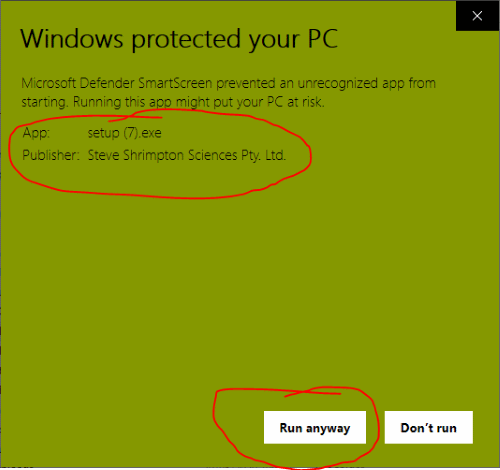
Figure 1.4 You now see the Full Information about WifiTrax Workshop
You can now see that the app is from Steve Shrimpton Sciences Pty. Ltd. the company that owns WifiTrax. The name of the app is created by the browser and is the installer rather than the app itself. You must now click "Run Anyway"
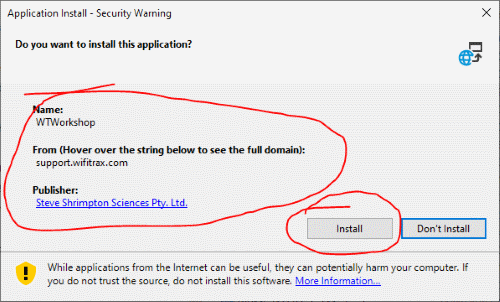
Figure 1.4 The installer is now running
The installer now runs, telling you that the app is called WTWorkshop and, yet again, the publisher and that it comes from support.wifitrax.com.
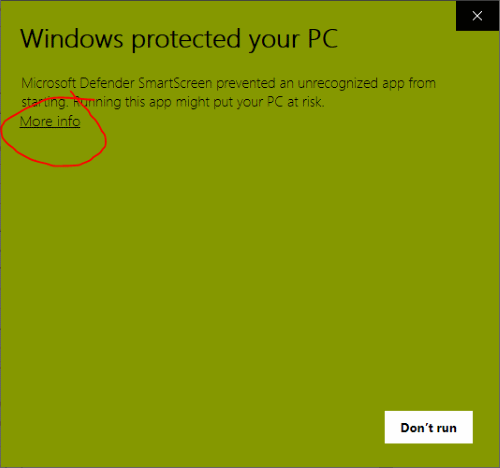
Figure 1.5 The app now starts and Windows again says this is an unknown app.
Once you click Install, Windows goes through its install process, the Workshop app is installed and will start. Windows, once again warns you and you have to click "More Info" again. Don't worry, this only happens the first time WifiTrax Workshop.
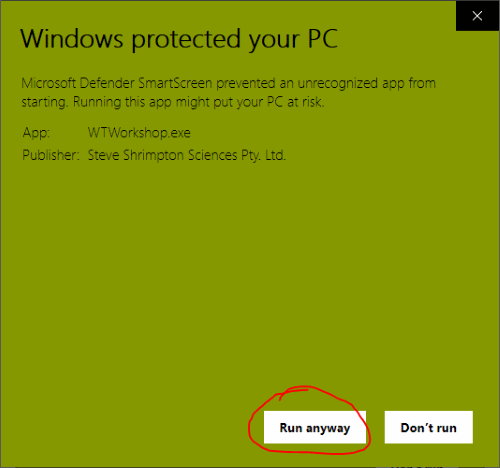
Figure 1.6 See the WT Workshop Origin and click "Run Anyway"
Now you see that the app you are running really is WTWorkshop from Steve Shrimpton Sciences Pty. Ltd. and you again click "Run Anyway". The applicaltion now starts and invites you to create an account. This is described in the next section.
Creating your Account
To use the WifiTrax Support Service for things such as upgrading your firmware, you must create an account. We require this to avoid people who might try to install our firmware in a product of their own manufacture. Our firmware cost a lot of time and money to write, so we must protect it. We hope you understand.
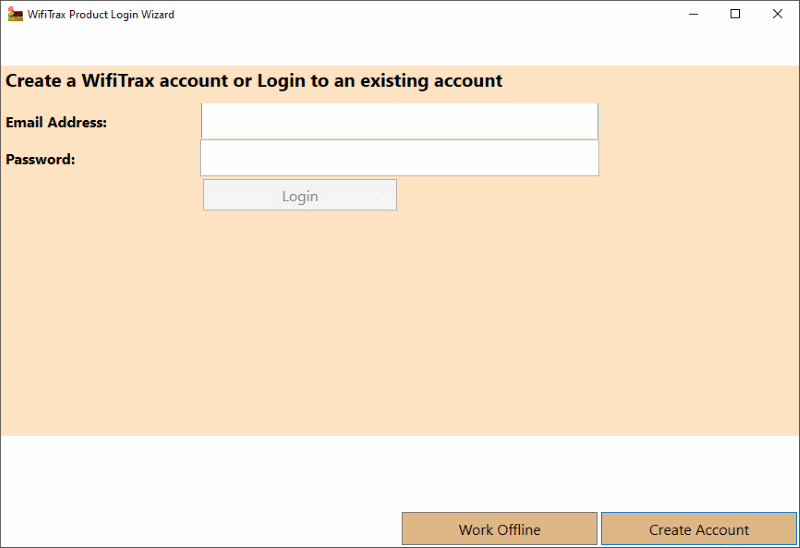
Figure 1.7 Login or Create Account page
Since, on your first use, you do not have a WifiTrax account, you should click the Create Account button. As an alternative, you can click the "Work Offline" button and create your account later. When offline, you cannot access the WifiTrax Support Service to register products or upgrade firmware.
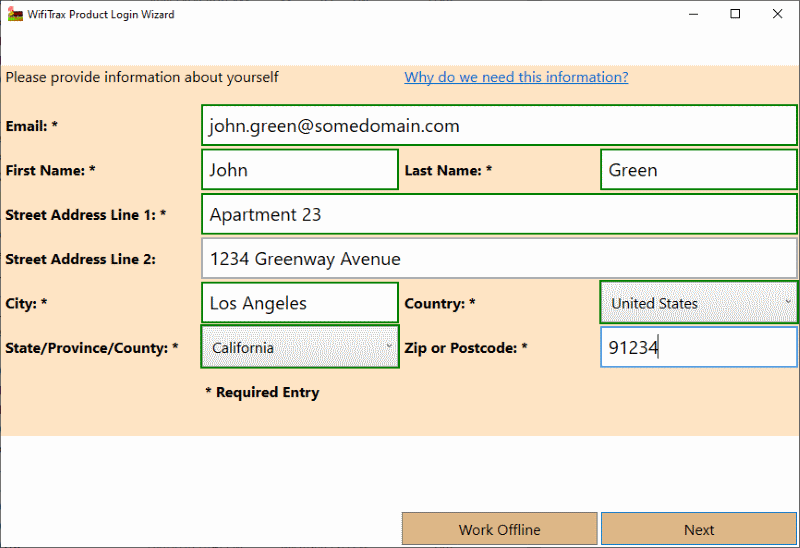
Figure 1.8 Create Account, Personal Details Page
The first page requires you to give details about yourself. The entries marked with a * are required. Selection of a country, such as United States, Australia or United Kingdom affects the State/Province/County entry, so that for countries with states, you must select a valid state. For countries without states, enter the county or region in free text. If your address has no state or county or no postcode, write None. When the form is complete, the Next button will be enabled. When you click Next, a check is made to verify that the account does not already exist before the next page is displayed.
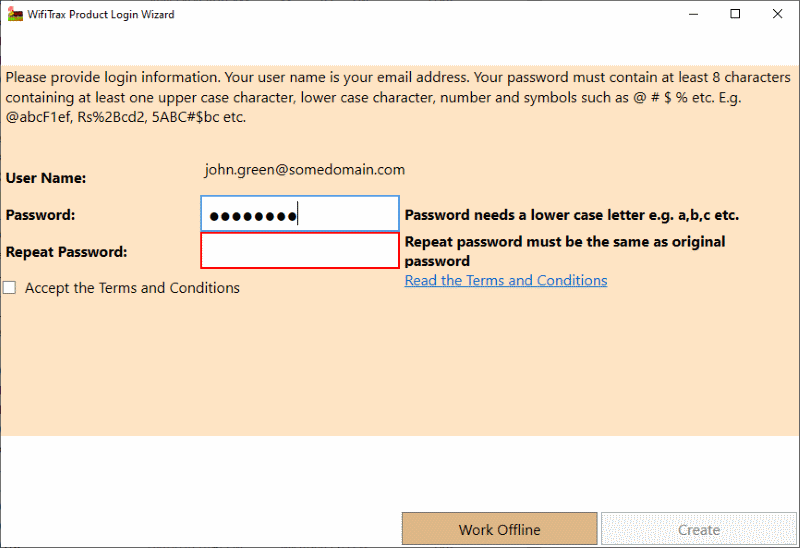
Figure 1.9 Create Account, Password Page
The final page requires you to provide a password, verify it and accept the terms and conditions. The password that you provide must be at least 8 characters
and must contain at least one character from each of the following groups:
Upper Case Letters
Lower Case Letters
Numbers
Characters such as @, #, %, & etc. that are neither letters nor numbers. Quotes, Parenthesis, commas and semicolons are not permitted.
Remember to check the box accepting the terms and conditions. You can read these using the hyperlink provided.
Finally click the Create button.
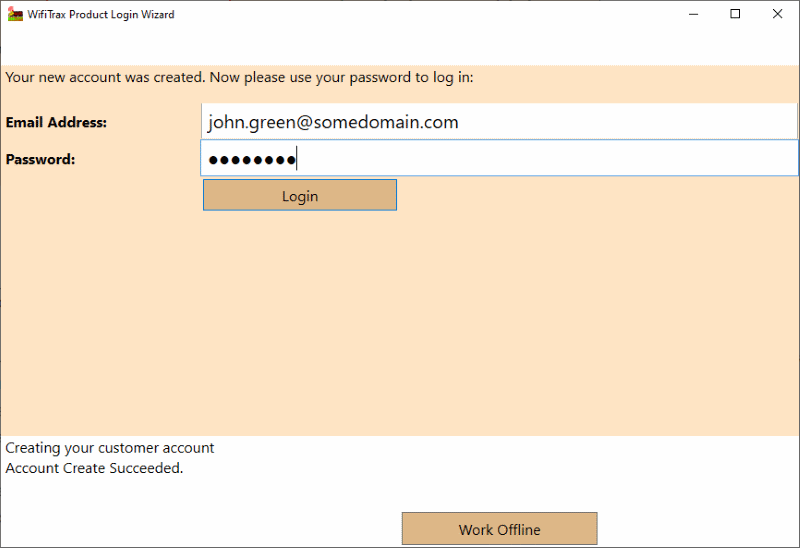
Figure 1.10 Create Account, Login Page
Once your account has been created, you need to login using your password. Make sure your email address is correct, type your password, then click the
Login button.
From now on, each time you start the WifiTrax Workshop application you will be invited to log on to you account or you may work offline.
If you forget your password, click the Forgotten Password button on the Log In screen and you can request an email to be sent to the email address
associated with your account. The email will contain a link that will take you to a page in which you can reset your password.
Discovering and Registering your Product
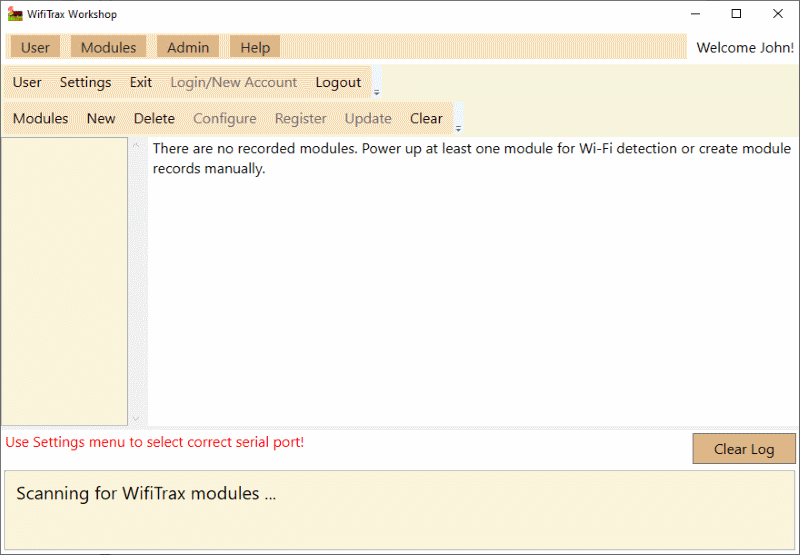
Figure 2.1 WifiTrax Workshop Main Page
Before you can upgrade the firmware on any WifiTrax product, you must first register it. This records your ownership of a particular module. To do this you must have one or more modules in your workspace.The Main Page in Figure 2.1 shows the modules in your workspace in the left. Clicking on one, shows that module's details on the right. At the bottom of the main page is a Log section where messages are output by the software. In Figure 2.1, the main page shows no modules, so nothing can be registered or updated. Also notice that no serial port is selected and you are told to use the settings menu to select a serial port. This is the serial port that will be used to connect to the WifiTrax USB Workshop Adapter that you have either purchased (FWA-10 or FWA-11) or made yourself.
Adding a Product by Wi-Fi Discovery
If the computer on which WifiTrax Workshop is installed has Wi-Fi capability, you can automatically discover any WifiTrax module that you have.
To do this, simply power up the module and start WifiTrax Workshop and login to your account.
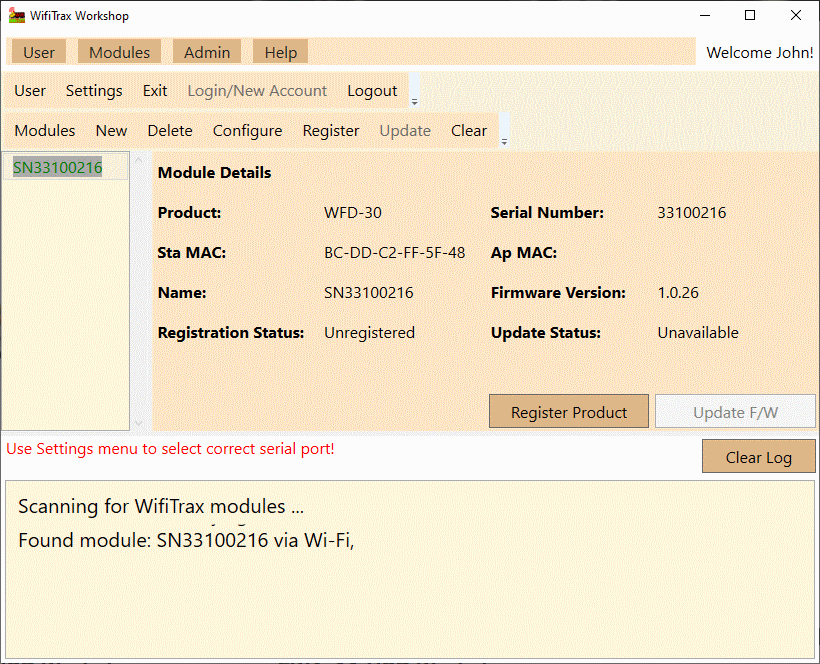
Figure 2.2 The Main Page with one Discovered Module - a WFD-30
After a period of time, which may be a couple of minutes, you should see your module appear in the list on the left of the main page, as in Figure 2.2.
Adding a Product Manually
If the computer on which WifiTrax Workshop has no Wi-Fi capability, or for some reason, you cannot automatically discover the WifiTrax module that you have,
you can create a module in your workspace manually.
To do this, use the Modules menu to select New.
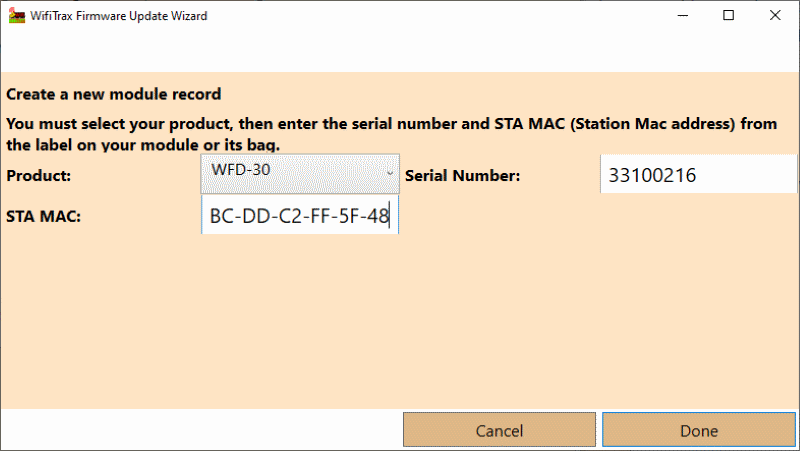
Figure 2.3 The Manual New Module Page
Figure 2.3 shows the New Module page. Copy the Serial Number and the STA MAC from the label on the module's bag or the label on the back of the module into the text boxes on this
page as shown in Figure 2.3. Click Done to create the module.
The STA MAC is the modules MAC address (MAC = Media Access Control) which is unique to every module manufactured.
The module will now appear in the list on the left, with its details on the right and you can attempt to register it. If you have given the correct serial number that matches with the
STA MAC in our database, you will be able to register the product.
Registering your Product
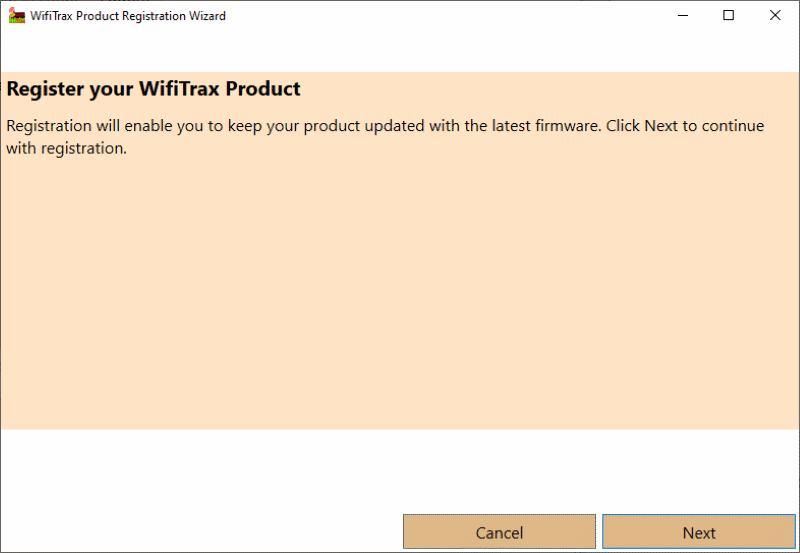
Figure 2.4 The Registration Introduction Page
Click Next on the first page of the registration sequence to continue.

Figure 2.5 The Registration Introduction Page
The second page checks the details you have entered or discovered to make sure the product you are trying to register is valid and in our database. If the product is valid, click Next to register the product in your name.
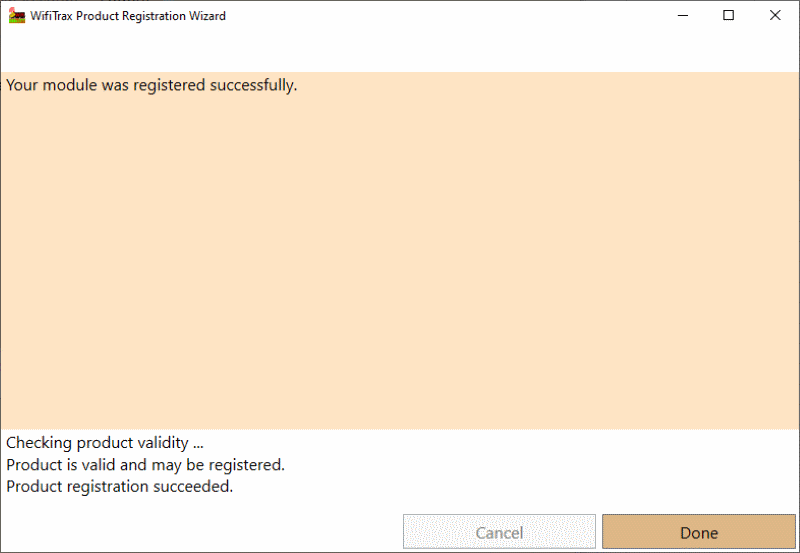
Figure 2.6 The Registration Introduction Page
The final page of the registration sequence confirms registration was successful. Click Done to return to the main page.

Figure 2.7 The Main Page with a Registered Product Selected.
The main screen now shows the product has been registered. The Update F/W button is still disabled. This is because no serial port has yet been set, but it may also be because the module is already at the latest firmware version available.
Upgrading your Product
Connecting your Workshop Adapter and Installing Drivers
Current WifiTrax modules are updated using a serial interface via a USB Workshop Adapter
that you have either purchased (FWA-10, FWA-11, FWA-20, FWA-21) or made yourself. Before you attempt to upgrade,
connect your Workshop Adapter using a USB Cable and make sure your computer sees it as a serial port. You may have to download
and install drivers on your computer for the FT232RL USB to Serial UART IC included in the Workshop Adapter. These can be obtained at the web site:
D2XX Drivers - FTDI (ftdichip.com)
There are instructions provided to install the drivers. Once you have installed the drivers make sure that the USB Workshop Adapter
is properly installed in Device Manager on your computer.
You will not see the port for the Workshop Adapter in the Settings page described next if you have not installed the drivers.
If you are using a USB Hub, these can be a bit temperamental and you may need to disconnect and reconnect the hub before your Window operating system
sees the port!
The Settings Page
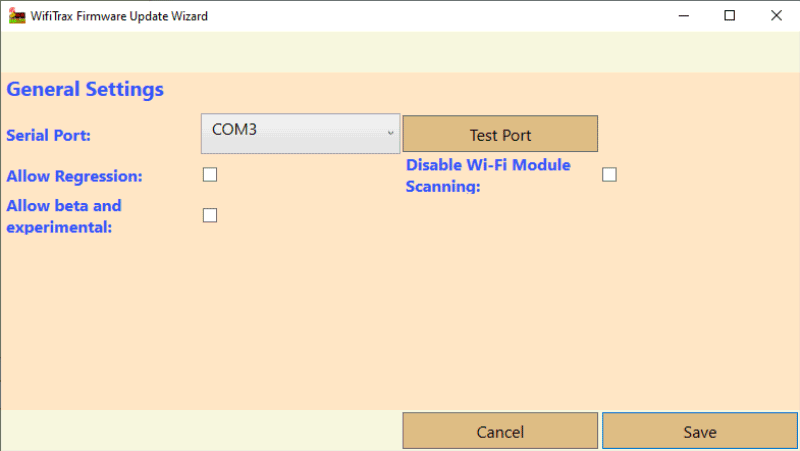
Figure 3.1 Using the Settings Page to Select the Serial Port to be used for Product Firmware Upgrade
Current WifiTrax modules are updated using a serial interface via a USB Workshop Adapter
that you have either purchased (FWA-10, FWA-11, FWA-20) or made yourself.
Before you can upgrade the firmware on any WifiTrax product, you must select the serial port on your computer that represents this module.
To do this, connect your USB Workshop Adapter to one of your computer's USB ports, then display the Settings screen using the User, Settings menu.
On the General Settings, select the correct port in the Serial Port combo box and click Save.
On the main page, if updates are available, for your registered module, the Update F/W button will be enabled. However most people will not want to update their module with an earlier version of the firmware than the one already installed. Therefore, the Update F/W button is not enabled if only earlier versions, or the same version are available. Installing earlier versions is called regression and if you want to be able to regress, or at least see the earlier versions, you can check the "Allow Regression" checkbox on the settings page.
The settings page also allows you to allow for the inclusion of beta release versions or experimental versions to be included in the list of upgrades available. These releases may not be reliable and are there to allow some railroaders to assist WifiTrax in evaluating new versions of software that have not yet been fully tested.
Another checkbox on the settings page disables Wi-Fi Module Scanning, so that powered-up modules are not automatically discovered but must be entered manually. When Wi-Fi Module Scanning is disabled, the Workshop Application will remain connected to your home network and may be more stable.
Performing an Upgrade
To perform an upgrade click the Update F/W button on the main screen.
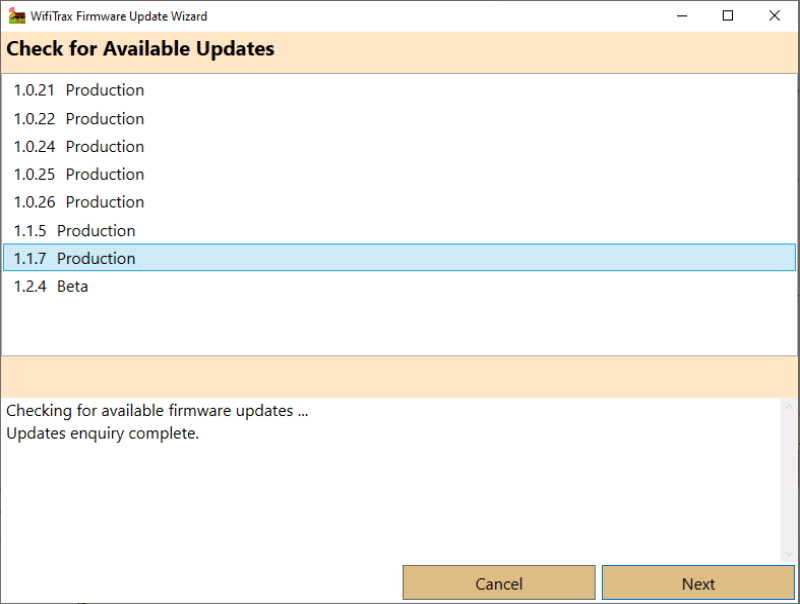
Figure 3.2 Viewing Available Upgrades
Figure 3.2 shows the first page of the update wizard with available firmware updates listed. Select the one you want and click Next.
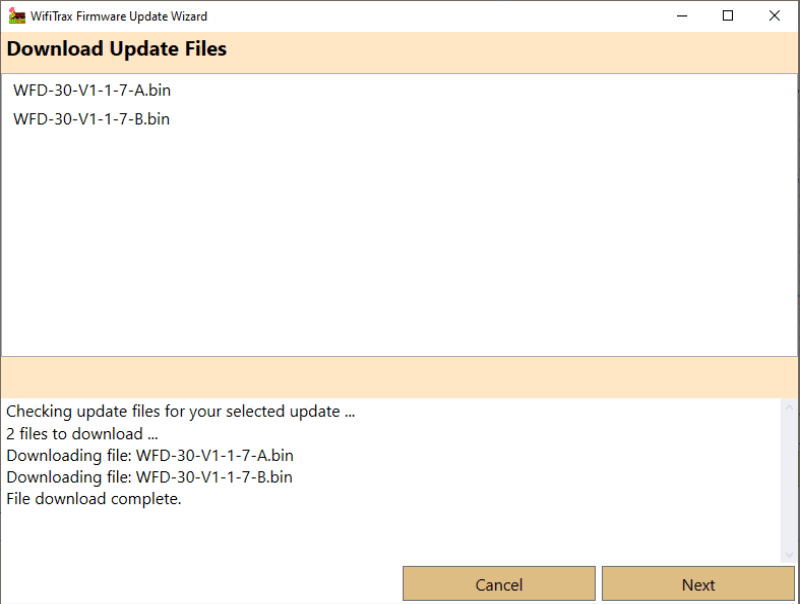
Figure 3.3 Downloading the Files
Figure 3.3 shows the File Download page. The files required for the firmware update are downloaded, unpacked and held in your computers memory. They are not saved to your hard drive. When download is complete, click Next.
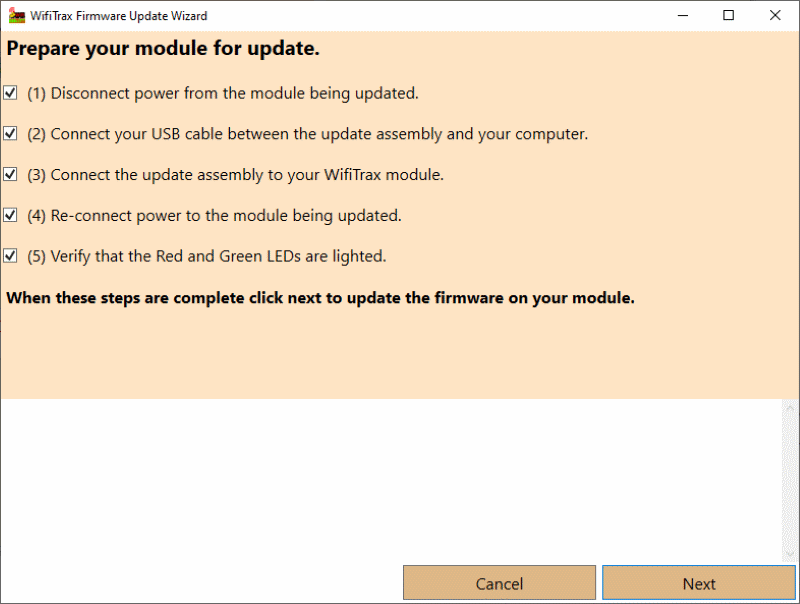
Figure 3.4 Preparing the Connections - an example. Different Modules have varying sets of instructions.
The next page, in figure 3.4 shows an example of the steps you must take before actually initiating the upgrade to your module's firmware. Read them carefully and click each
checkbox as you complete it. Steps listed will vary according to the type of module being upgraded. The manner in which the Workshop
Interface Module is connected to the module being updated will also vary. For example, Interface Modules with grabber leads have connections
as below. Be sure to connect the grabber leads onto the correct holes in your module:
Black Lead - GND
Yellow Lead - TXD
Orange Lead - RXD
White Lead - /PGM
On no account connect any other leads, such as power, to these points or the module is likely to be destroyed.
Other modules use JST or other types of connectors which can only be inserted the correct way.
When these steps are complete, click Next.
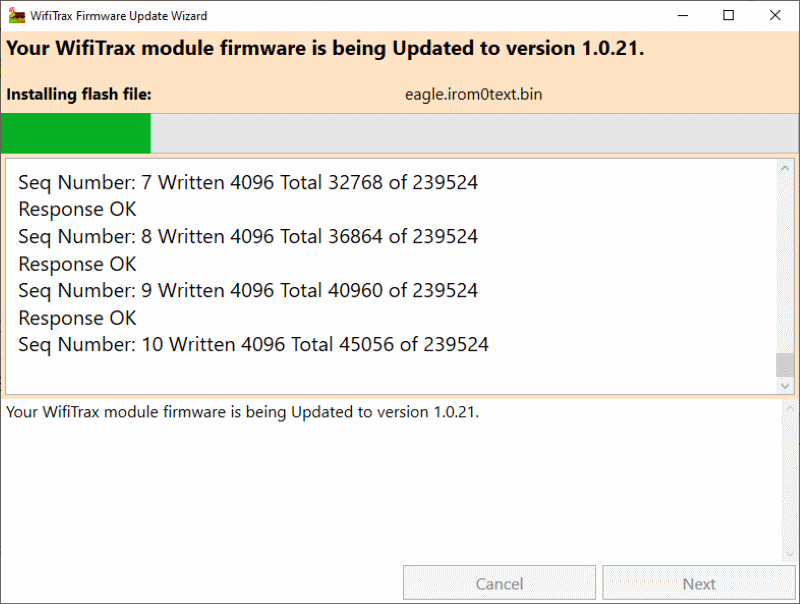
Figure 3.5 The Upgrade Taking Place
The update of the firmware now proceeds automatically. Do not interrupt the process, disconnect power or touch any of the leads until this screen shows complete.
If the firmware update process is interrupted, the module will be rendered completely inoperable. However if such a disaster does happen, you can repeat the upgrade process
but the module will no longer be detected by Wi-Fi until the firmware update process completes correctly.
Once the upgrade is complete, click Next.
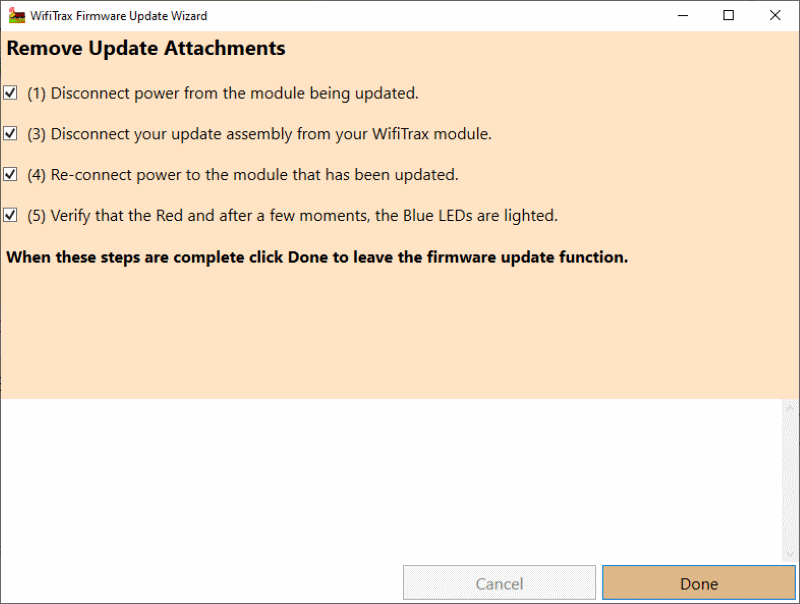
Figure 3.6 Preparing the Module for Restart - an example. Different modules will require varying steps listed.
The next page, figure 3.6, provides a checklist of steps to return the module to its normal state.
Carefully follow the instructions, clicking each checkbox as you go. Some updates may require a factory reset and a button is enabled when necessary. A power cycle may also be required.
When all is complete, click Done.
The update wizard closes and the main page returns. After a while, which may be several minutes, the information for the selected module should show the new
firmware version.
You can now exit from WifiTrax Workshop and return your module to normal usage.